Appliance repairs can be difficult. It’s important to find a reliable repair service that can do quality work and provide exceptional customer service.
Fixing household appliances yourself is cost-effective and time-saving, but it also requires a bit of knowledge. Follow these tips to help you repair your appliances safely and effectively.
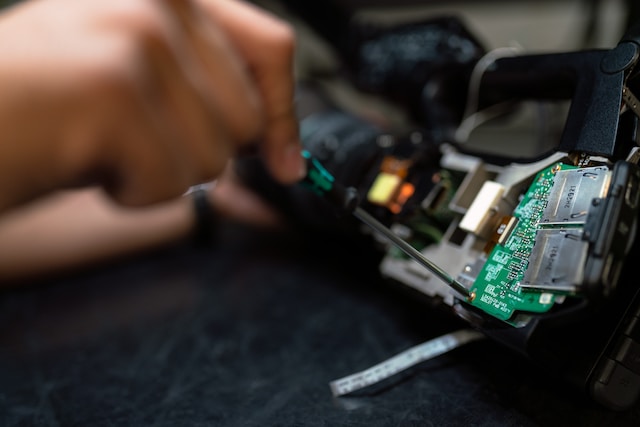
1. Use the Right Tools
Depending on the appliance you are fixing, there are some tools that should be in your tool kit at all times. For example, you should always have a set of pliers in your appliance repair tool bag because they can be useful for jobs such as removing screws or loosening connections. Another essential tool is a putty knife, which is helpful for scraping, prying, and spreading putty. It is also helpful to have a pair of work gloves, safety goggles or glasses, and thread-sealing tape. Lastly, you should also have a small shop vacuum because it is easy to make a mess when taking apart appliances.
Using the right appliance repair tools will help you save time and money in the long run. It will also ensure that your customers are satisfied with the results. Additionally, hiring an appliance repair technician will prevent you from making irreversible mistakes and potentially causing further damage to the device.
Before you start working on an appliance, make sure it is unplugged from its power source and that the cord is not wrapped around the plug terminals. This will keep you from getting shocked and will also protect you against fire hazards. It is also important to wear protective gear, such as gloves and a face mask, because there is a chance that you will come across chemicals or dust particles during the process.
When you are ready to begin repairing the appliance, be sure to take a look at the owner’s manual for the specific model that you are working on. This will give you a good idea of what to expect from the task at hand, and it may even provide some troubleshooting tips that can help you narrow down the problem.
If you are unsure what is causing the malfunction, then you should test the wiring of the appliance. This will help you figure out which component is faulty, so you can replace it accordingly. A multimeter is a great investment for this purpose because it will allow you to measure voltage and other important signals.
2. Clear the Space
Having the right tools is essential for completing appliance repair jobs effectively, but it’s also important to make sure that you have a clear workspace. This will help you avoid getting your hands dirty and making a mess that will require further cleaning or even additional repairs.
One of the most common reasons for a small appliance to break down is because of dust or hair build-up. To avoid this, try running the appliance on a cleaning mode that is usually explained in the user manual.
Another common reason for appliances to malfunction is because of the electrical wiring. To avoid this, always use a multimeter to test for voltage in wires and avoid touching them with your fingers. It’s also a good idea to invest in a pair of needle-nose pliers, which can grip small parts and bend or cut wires more easily than standard pliers.
Lastly, it’s also important to have a pair of protective gloves when repairing appliances because they can protect your hands from sharp materials and edges. It’s also a good idea for appliance repair technicians to wear shoes covers to prevent them from tracking dirt or chemicals into customers’ homes.
Insurance premiums can account for a significant percentage of appliance repair operating costs. While they may seem expensive, they are necessary for protecting your business’ assets and finances. Fortunately, you can reduce your insurance premiums by following best practices and shopping around for the best deals.
Most appliance repair businesses require their technicians to travel to clients’ homes. This can result in high vehicle maintenance and fuel expenses. To minimize these costs, your business can purchase vehicles that get excellent gas mileage and implement energy-saving techniques like minimizing idling time and avoiding heavy acceleration and braking. By doing this, you can save hundreds of dollars in fuel and vehicle maintenance expenses each year. Moreover, you can boost your business’s profitability by optimizing inventory management with appliance repair software. This will enable you to efficiently order spare parts, automate reorders, and track inventory. This will avoid having to keep appliances on hold while waiting for a replacement part.
3. Test the Wiring
A good appliance repair technician knows how to use a multimeter to measure resistance and voltage. These are measurements that determine if a component is working within factory specifications. Every electrical part has some level of resistance including motors, heating elements and water inlet valves. The key is to test the circuits in which these components operate to isolate the problem.
To do this, you’ll want to make sure the appliance is unplugged and that the breaker or switch that controls the receptacle that powers it is turned OFF. You’ll also want to take a picture of the wiring diagram before you begin your work. This will give you a reference point for where the different wires connect, which can help you locate the problem.
You’ll also want to remove the outer insulation from each end of the wires that you want to test with your meter. You should then strip off about 1/2 inch of the inner insulation. This will expose the conductor wires that you’ll need to connect your meter. You can then measure the resistance of each of the conductor wires with your meter. If you find that a particular wire is not passing current through the appliance, this may be the reason why the appliance isn’t working.
In addition to measuring resistance, you can also check for continuity in the circuits with your meter. This is an important step because it can tell you whether or not a wire has been cut, which would indicate a break in the electrical circuit. You can do this by tracing the wires that connect to the specific electrical component you’re testing.
When doing this, be careful not to mistake black for “hot” and white for neutral. This can lead to you causing an accident that could hurt you or damage the appliance. It’s best to always use a colored tip on your meter so that you can differentiate the different wires.
Using a multimeter to conduct resistance and voltage tests on your appliances is one of the most effective ways to diagnose a problem. However, it’s important to remember that you should never conduct live voltage checks without wearing proper electrical safety equipment. This includes electrical safety gloves and an insulated hat.
4. Test the Components
Appliances work hard year after year, and it’s easy to take them for granted until they stop working. That’s when it becomes obvious that they need a little love and attention. This is why it’s important to know how to diagnose and repair appliances if you want to save money.
Having the right tools, a clean workspace and a good supply of spare parts is key to getting an appliance up and running quickly. For the best results, make sure to keep spare parts tagged and easily retrievable using an inventory management app to avoid lost time due to searching for a specific part.
You’ll also need a multimeter, which is a handheld tool that measures electrical values like voltage and resistance. The most common functions for a multimeter include checking continuity, testing for the presence of a current and checking the amount of resistance in an individual component. To test for continuity, plug the two test probes (one red and one black) into the multimeter and touch them to the component you’re testing. If the multimeter reads zero, that means there is a complete pathway for electricity to flow through the element and that it’s in good condition.
If you’re testing a capacitor, make sure it has been discharged before attaching meter leads. Capacitors can hold an electric charge even after the appliance has been turned off, which can cause inaccurate readings. If you’re unsure of how to test for this, try using a high-wattage high-ohm resistor to discharge it.
It’s also important to check that the outlet the appliance is plugged into is working. If the outlet is faulty, it could be the source of the problem and may need to be replaced.
Before taking apart an appliance, ensure that the power connection is turned off for safety reasons. You should also wear protective glasses and follow the manufacturer’s recommendations on safety when disassembling a machine. If you’re not comfortable working on an appliance, don’t hesitate to call a professional. They’ll be able to troubleshoot and fix the problem much more quickly than you would be on your own.